


This coop is an adaption of Joel Salatin’s chicken tractors. I have seen his tractors but have never found a design online and finally just had to guess a bit and build one. I built a coop a few years ago which turned out to be too heavy to move efficiently. I literally went to the drawing board last year and came out with a Salatin-esque tractor. Salatin builds his coops as a 12’x12’x2′. They are half sheltered and half “open,” that is, covered with chicken wire to contain the birds but allow them to be exposed to sun, they are completely exposed to the grass, which is the key to the success of this design.
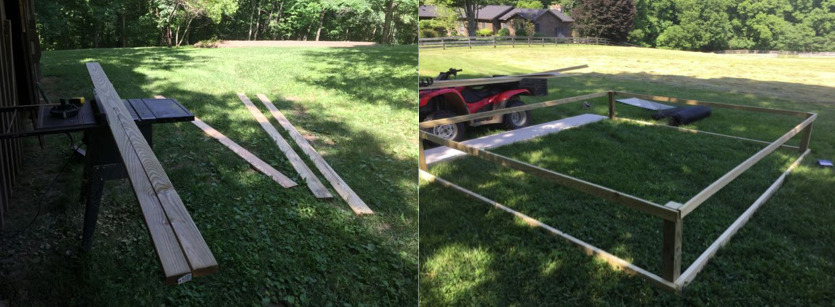
Based on the previous coop failure, my first goal was mobility, ease of movement. Light weight, but durable materials would be needed to make the coop mobile. There is a fair amount of stress placed on the frame of the coop, especially with any excess weight. With that in mind I decided to use 12′ plastic roofing sheets. The shelter area, sides and top would be made out of louvered roofing sheets. I found these sheets at Lowes for $20 each, I purchased 5.
The frame would be wood and the base would need to be particularly bulky to prevent degradation over the years of movement and exposure to weather and contact with the ground. To this end, I selected 4 treated 2″x” 4″x12′ at about $6.50 each. The front and rear 2″x4″s need to be trimmed down by 3″ to ensure the 12′ roof panels, which lay perpendicular, will fit over the frame. The sides are 12′ and the front and back are butted up and therefore shorter by about 3″. The frame is screwed together with 2.5 deck screws. To create the vertical height I chose a 4″x4″x8′ – this was cut into 2′ sections and screwed again on each side to create that durability.

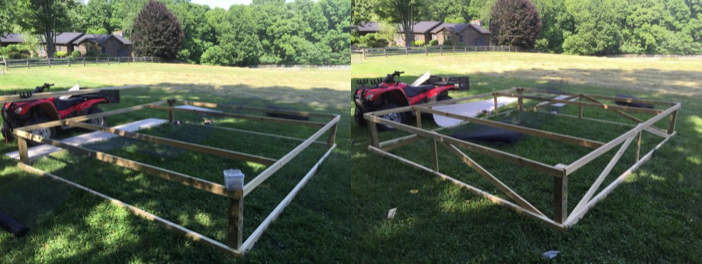
Now everything above the base frame is support. It does not have to be overly strong as it is only load bearing for sheets of plastic roofing and chicken wire. I purchased 5 deck boards, again at 12′. I ripped the deck boards in half, making 10 boards at 12′. I made a square frame out of 4 ripped boards, screwed into the top of the 4″x4″ supports.
On 3 sides I placed a 2′ vertical support at the center of each side. On the rear I added 2 vertical supports at 34″. I then ran 2 horizontal supports, from front to rear, at 34″, measured from the outside. These two supports are butted up to the frame and screwed into the frame. They will have to be trimmed about 3″, measure this before you cut it. I then made angled supports with the remaining ripped deck boards. I have never been good at cutting things to angles, I just held the boards up and used a pencil to mark them.
Using chicken wire (costly but sturdier) or in my case deer net (cheaper but weaker). 3/4 of the coop frame should be covered in wire, leaving an open area in the rear for access. This wire is secured by cap nails, those are 1″ roof nails with a plastic cap, the cap secures the wire to the wood. Nail the wire to frame appropriately, making sure not to leave room for small birds to escape. A word about wire vs net. If you favor wire based on security, knowing that a predator could go through plastic net, a determined predator will dig under your coop to get to the birds. I have a Pyrenees who is tasked to the protection of the animals. I opt for plastic as the goal is only retention.
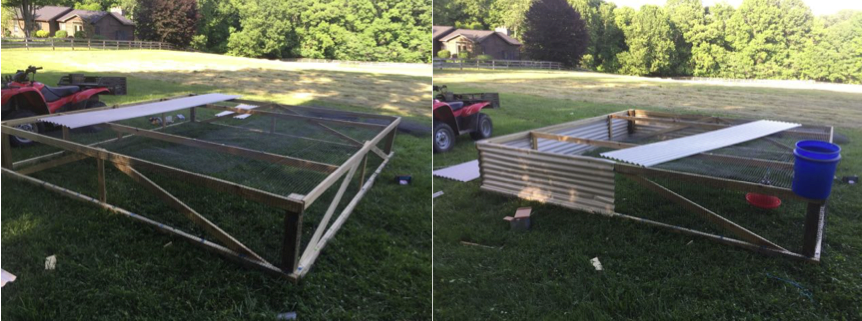
The plastic roofing is next. A small amount of razor cutting will need to be done. The first sheet will go against the back of the coop. Using cap nails to nail it to the bottom 4″x4″ and then to the top/sides. You will need to trim the top, just a few inches to make it even with the top rail. Cut one sheet in half making two 6′ sections, these will be the sides, nailed in the same manner. Making sure to secure the corners to keep them tight against potential escapees.
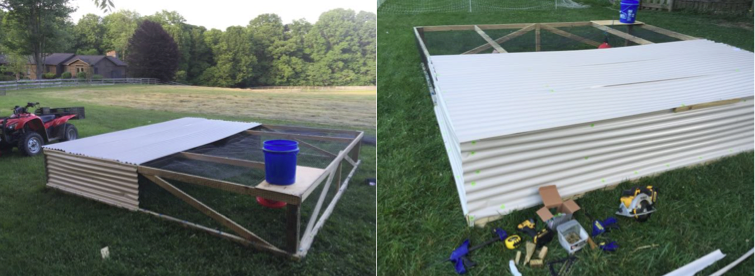
Finally the top, using 3 sheets lay them out to ensure proper fit. They should overlap at least one louever to ensure that it’s water resistant. The last roofing sheet will be used for acess and feeding. It will be secured by cap nails only at the front most part to make it hinge. I then use a remaining piece of deck board, ripped again and screwed to the horizontal supports to assist in the hinged opening.
From here you can use any type of feeder/waterer you prefer. I use a plasson bell waterer, tied to the front of the horizontal support, this is fed by a 5 gallon bucket and is maintenance/trouble free. I use a tradiitional feeder hung under the cover of the roof, easily accessible and protected from rain. Chickens kept in a tractor will eat 1/4 less feed on average than the same amount of those chickens kept in confinement, like a brooder. Building the coop took me about 2.5 hours by myself. Tools needed are a circular saw, drill, hammer, pencil, square and a measuring tape. Nice to have are a table saw and clamps. Finally – you will need two dolly/hand trucks. I have bought them from tractor supply as well as from craigslist, the craigslist finds were just as good but 1/4 of the cost. If I’ve left you with questions, please ask, if this design can be improved, please let me know.
From the farm
